

Before you begin
- Sign in to the Clawdi dashboard.
- Confirm that Deploy on Clawdi is available.
- Review the available software, AI access, compute, and price options.
Steps
1
Open Deploy
Choose New Agent, then Deploy on Clawdi.
2
Configure the Agent
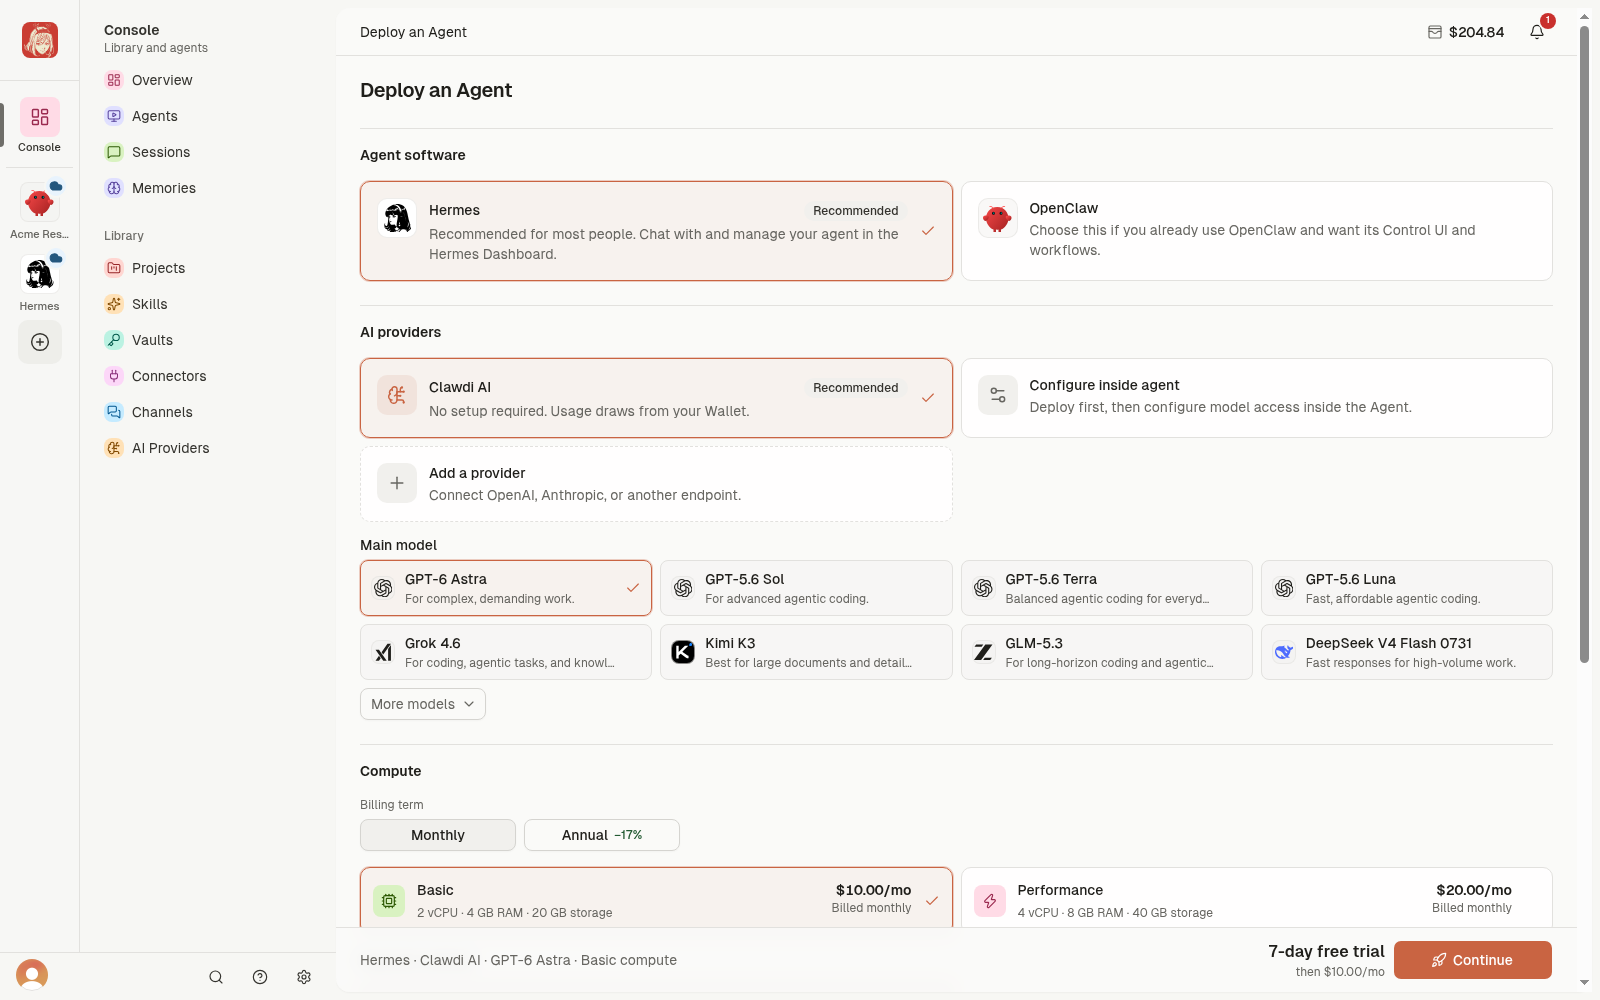
Name the Agent and choose Hermes or OpenClaw. Choose AI access and compute,
then continue to review the current price and checkout terms. Confirm once.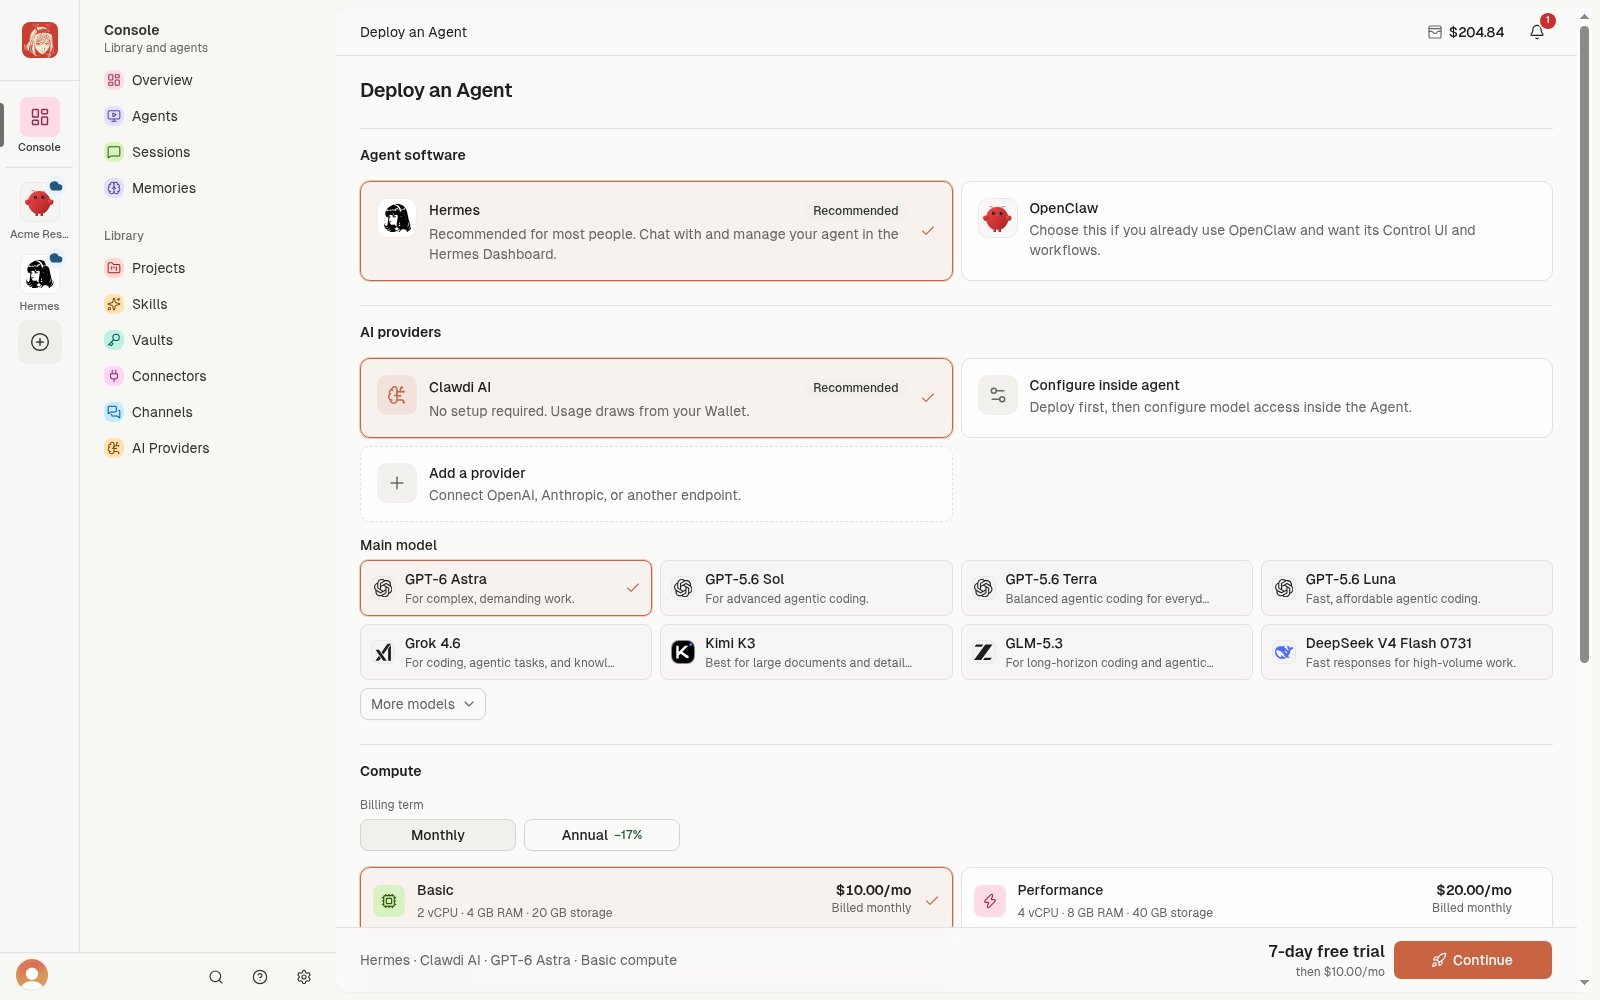
3
Wait for Running
Open the Agent page and wait for Running. Starting is expected.For Failed or unclear states, see states and recovery.
4
Run a task
Open Hermes Dashboard or OpenClaw Control UI, wait until it is
ready, then send a small task:
Turn these notes into a checklist: choose a date, invite the team, and prepare an agenda.
The Agent shows Running and responds in Agent Interface.
Next steps
Give the Agent context
Add a reusable fact or preference.
Connect an app
Authorize an app and verify its tools.
Agent Interface, Files, and Terminal
Learn access and persistence boundaries.
Share a Project
Invite a teammate to reusable instructions and resources.
Advanced: deployment automation
Advanced: deployment automation
Use Automate Cloud Agent deployment for
CLI creation, idempotency, and recovery guidance after your first dashboard
deployment.